
How to create dynamic pages in Gatsby from MDX and YAML?
Learn how Gatsby deal with different data sources


Gatsby allows you to tie data from many different sources together and present them in a unified way.
In this article, we'll discuss how to set up Node JS and Gatsby to pull the data, transform it into usable nodes, and auto-generate pages based on templates.
🔍 Data from Yaml File
We can store our data in a YAML file and then it acts as one of our data sources.
We'll store all our data sources inside the content folder.
In content/records.yaml file:
- name: Gatsby
  description: Static Site Generator

- name: HTML
  description: Static Website

- name: Node JS
  description: Server side rendering
🔍 Source Plugin
- We know gatsby can work with multiple data sources and it can add them all to our graphQL layer, however, to do this for each source that we use we need to install and register a source plugin, and that way gatsby knows how to connect to that data source.
- Source plugins are all registered inside the gatsby config file inside the plugin array.
- plugins also need to be installed into our project using npm, so gatsby can find them as well.
📍gatsby-source-filesystem Plugin
- A gatsby source plugin for sourcing data into your gatsby application from your local filesystem.
- Install it using
npm install gatsby-source-filesystem. - Register them inside the plugins array in the
gatsby-config.jsfile.
module.exports = {
  siteMetadata: {
    title: 'Learn Gatsby',
    description: 'step-by-step guide to learn gatsby',
    author: 'Anuradha Aggarwal',
    lang: 'en',
  },
  plugins: [
    {
      resolve: `gatsby-source-filesystem`,
      options: {
        name: `records`,
        path: `${__dirname}/content/`
      }
    },
  ]
}
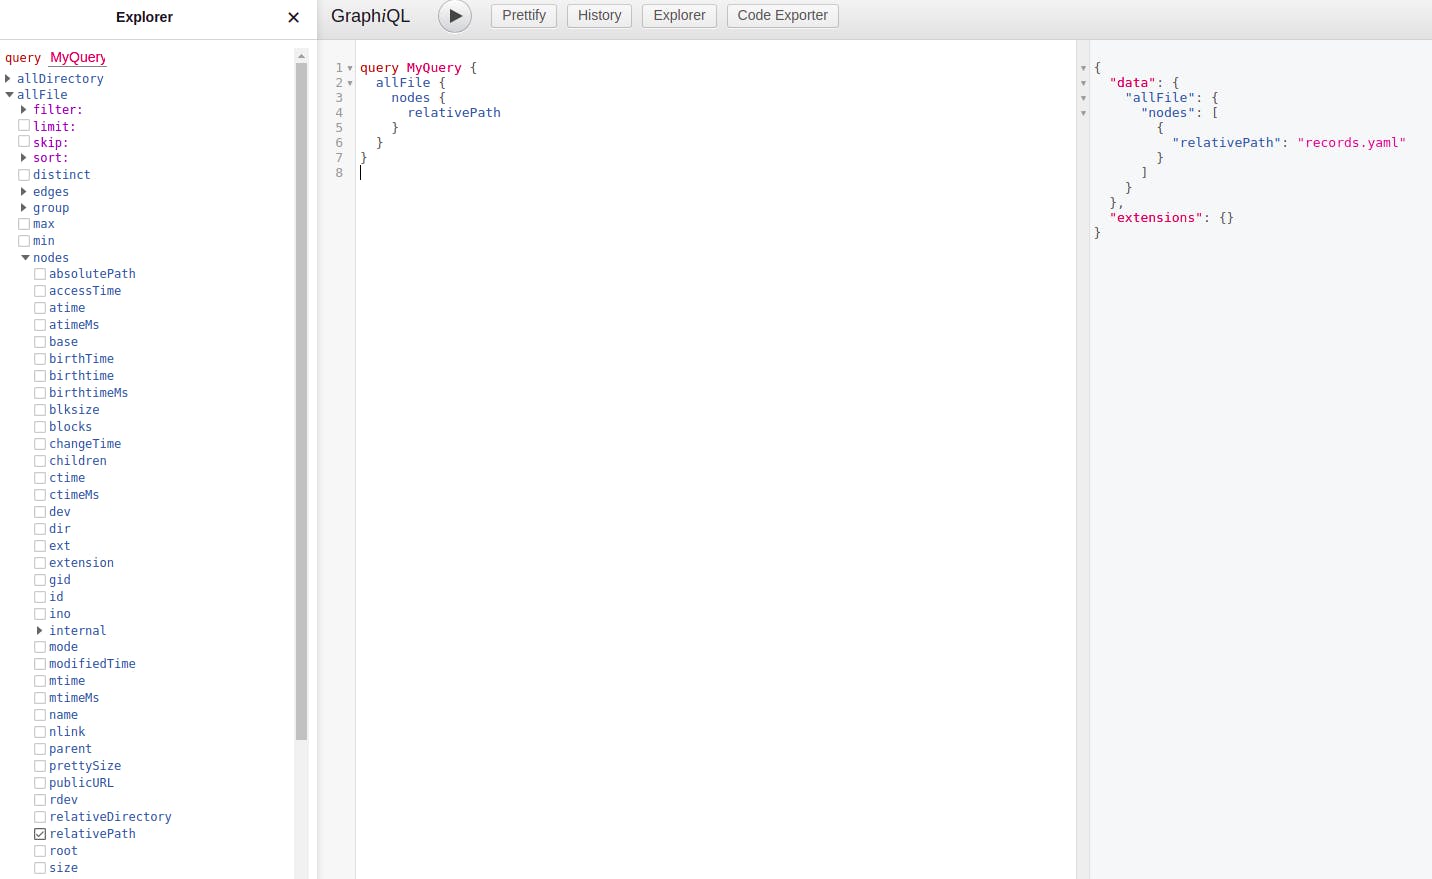
In the above code snippet, we'll provide the path of the directory which contains our yaml file.
- graphQL treats each file as an individual node. Now we can check in graphiQL that it will create a separate node in the graphQL layer.
- We can have multiple instances of the filesystem source plugin.
- For every different folder that we have, we need a different instance in the gatsby-config.js file.
Now let's see how Gatsby transforms this YAML file.
🔍 Transformer Plugins
We want gatsby to know that this file exists and we want you to process it as a YAML file so that we get a JSON object in return we can parse through GraphQL. That's done using the gatsby-transformer-yaml plugin.
- There are transformer plugins present for almost any type of data.
- The transformer plugin takes a data source & transforms it into something easier to use in our components that we can query in our graphql layer.
- Firstly, install transformer plugin for yaml file using
npm install gatsby-transformer-yaml - Now in
gatsby-config.jsfile, register this plugin.plugins: [ `gatsby-transformer-yaml`, { resolve: `gatsby-source-filesystem`, options: { name: `records`, path: `${__dirname}/content/` } }, ] - Now in graphiQL, we'll have a new type of content, which contains nodes related to our yaml file as well. Now if you run graphQL query you'll get the exact content that we have stored in our yaml file.
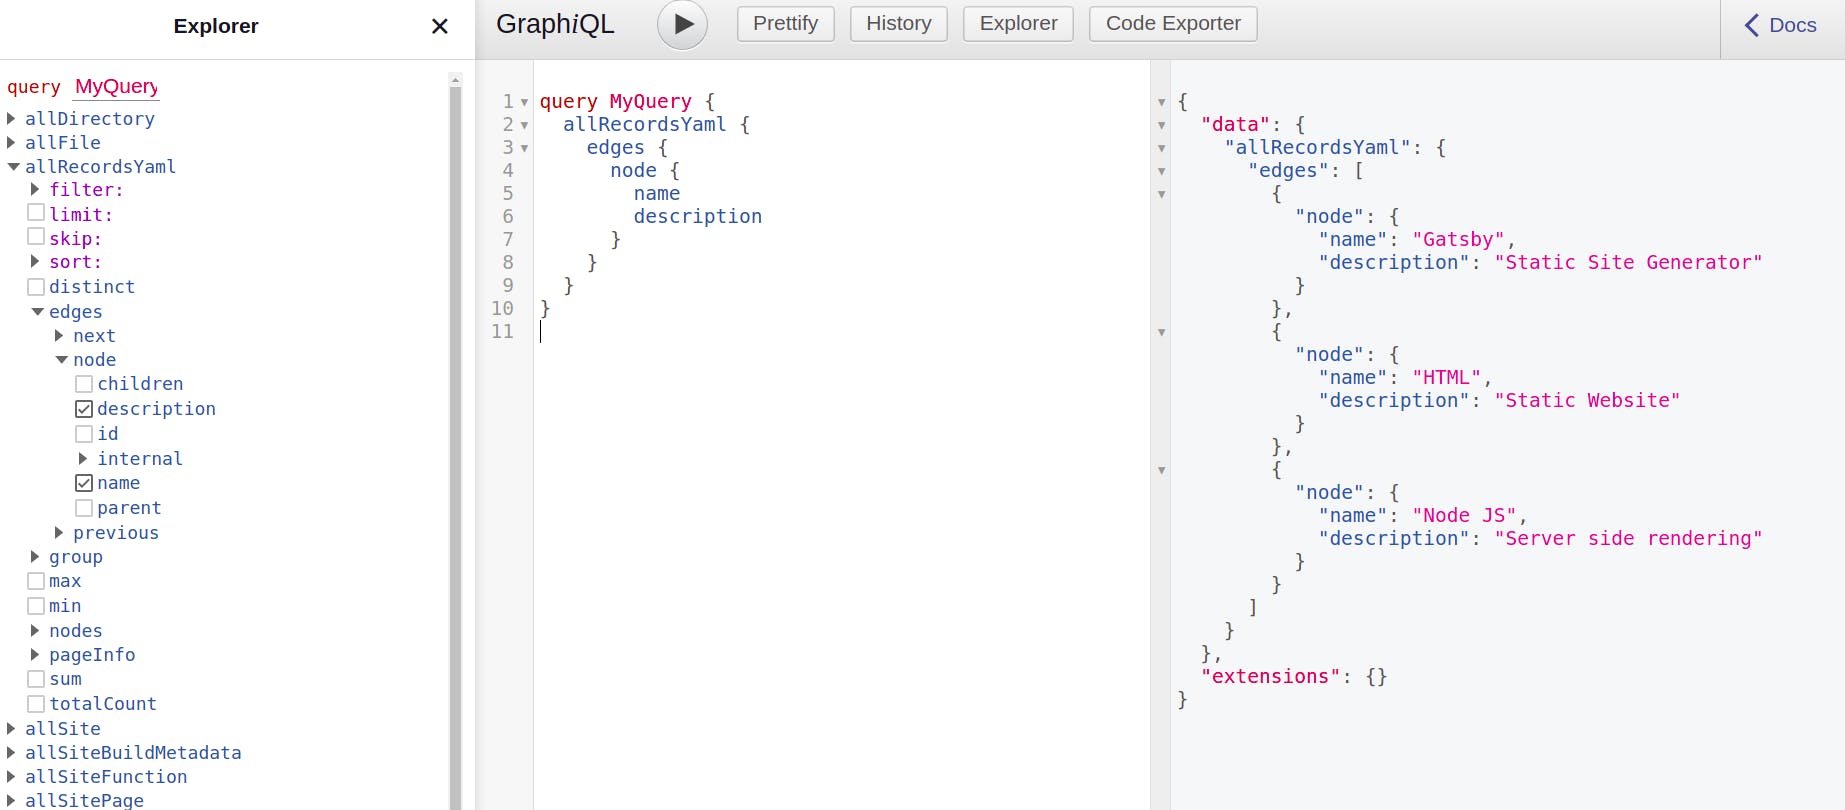
With the help of this plugin, we have full access to the data and we can use it to display on the front-end.
Once gatsby is able to access the data from the YAML file through GraphQL we can work with the data the same way as we have done in the previous post using graphQL queries.
This is one example to show how gatsby works with the data present in a different format. But what if we have data and we want to transform it into a separate page. Most common use case of gatsby is blogging platform.
Now let's see how gatsby works with Markdown files.
🔍Generate Pages from Markdown File
We'll follow the following directory structure for the below code:
📦gatsby-project
 ┣ 📂content
 ┃ ┣ 📜blog.mdx
 ┣ 📂public
 ┣ 📂src
 ┃ ┣ 📂components
 ┃ ┃ ┣ 📜Header.js
 ┃ ┃ ┗ 📜Layout.js
 ┃ ┣ 📂pages
 ┃ ┃ ┣ 📜about.js
 ┃ ┃ ┗ 📜index.js
 ┃ ┣ 📂styles
 ┃ ┗ 📂templates
 ┃ ┃ ┗ 📜Blog.js
 ┣ 📜gatsby-config.js
 ┣ 📜gatsby-node.js
 ┗ 📜package.json
📍Step 1: Create Markdown file
In the first step, we'll create a markdown file inside the content folder.
In content/blog.mdx file, create your markdown file
---
title: My first blog
description: This file is to show how to use markdown in the gatsby site
---

## What is Lorem Ipsum?
Lorem Ipsum is simply a dummy text of the printing and typesetting industry. Lorem Ipsum has been the industry's standard dummy text ever since the 1500s when an unknown printer took a galley of type and scrambled it to make a type specimen book. It has survived not only five centuries, but also the leap into electronic typesetting, remaining essentially unchanged. It was popularized in the 1960s with the release of Leeriest sheets containing Lorem Ipsum passages, and more recently with desktop publishing software like Lauds PageMaker including versions of Lorem Ipsum.

## Why do we use it?
It is a long-established fact that a reader will be distracted by the readable content of a page when looking at its layout. The point of using Lorem Ipsum is that it has a more-or-less normal distribution of letters, as opposed to using 'Content here, content here, making it look like readable English. Many desktop publishing packages and web page editors now use Lorem Ipsum as their default model text, and a search for 'lorem Ipsum will uncover many websites still in their infancy. Various versions have evolved over the years, sometimes by accident, sometimes on purpose (injected humor and the like)
As you notice in the above file we have some data inside triple dashes. This data is known as frontmatter
🪄 Frontmatter
Frontmatter in markdown file represents metadata or extra information about that particular file. It is denoted by the triple dashes at the start and end of the block.
📍Step 2: Register markdown content using source plugin
Now before we'll dynamically pump this data inside our graphQL layer, we need to inform gatsby that these markdown files are present here which will act as one of our data sources. So to do this we will register them inside the gatsby-config.js file using the source plugin as we have done before for yaml files.
module.exports = {
  plugins: [
    {
      resolve: `gatsby-source-filesystem`,
      options: {
        name: `blogs`,
        path: `${__dirname}/content/`
      }
    }
  ]
}
📍Step 3: Use Transformer plugin for Markdown
Transformer plugins in gatsby take a data source and transform it into something easier to use in our components that we can query in our graphQL layer.
For the markdown file we'll use the gatsby-plugin-mdx plugin:
- First, install it using
npm install gatsby-plugin-mdx @mdx-js/mdx@v1 @mdx-js/react@v1 - Register it inside
gatsby-config.jsfile, in plugin array.module.exports = { plugins: [ `gatsby-plugin-mdx` ] }
By default, only files with the .mdx file extension are treated as MDX when using the gatsby-source-filesystem. To use .md or other file extensions, you can define an array of file extensions in the gatsby-plugin-mdx section of your gatsby-config.js.
// gatsby-config.js
module.exports = {
  plugins: [
    {
      resolve: `gatsby-plugin-mdx`,
      options: {
        extensions: [`.mdx`, `.md`],
        defaultLayouts: {
          default: require.resolve("./src/templates/Blog.js"),
        },
      },
    },
  ],
}
Now when we check on graphiQL, it will show our markdown file content embed into the graphQL layer.
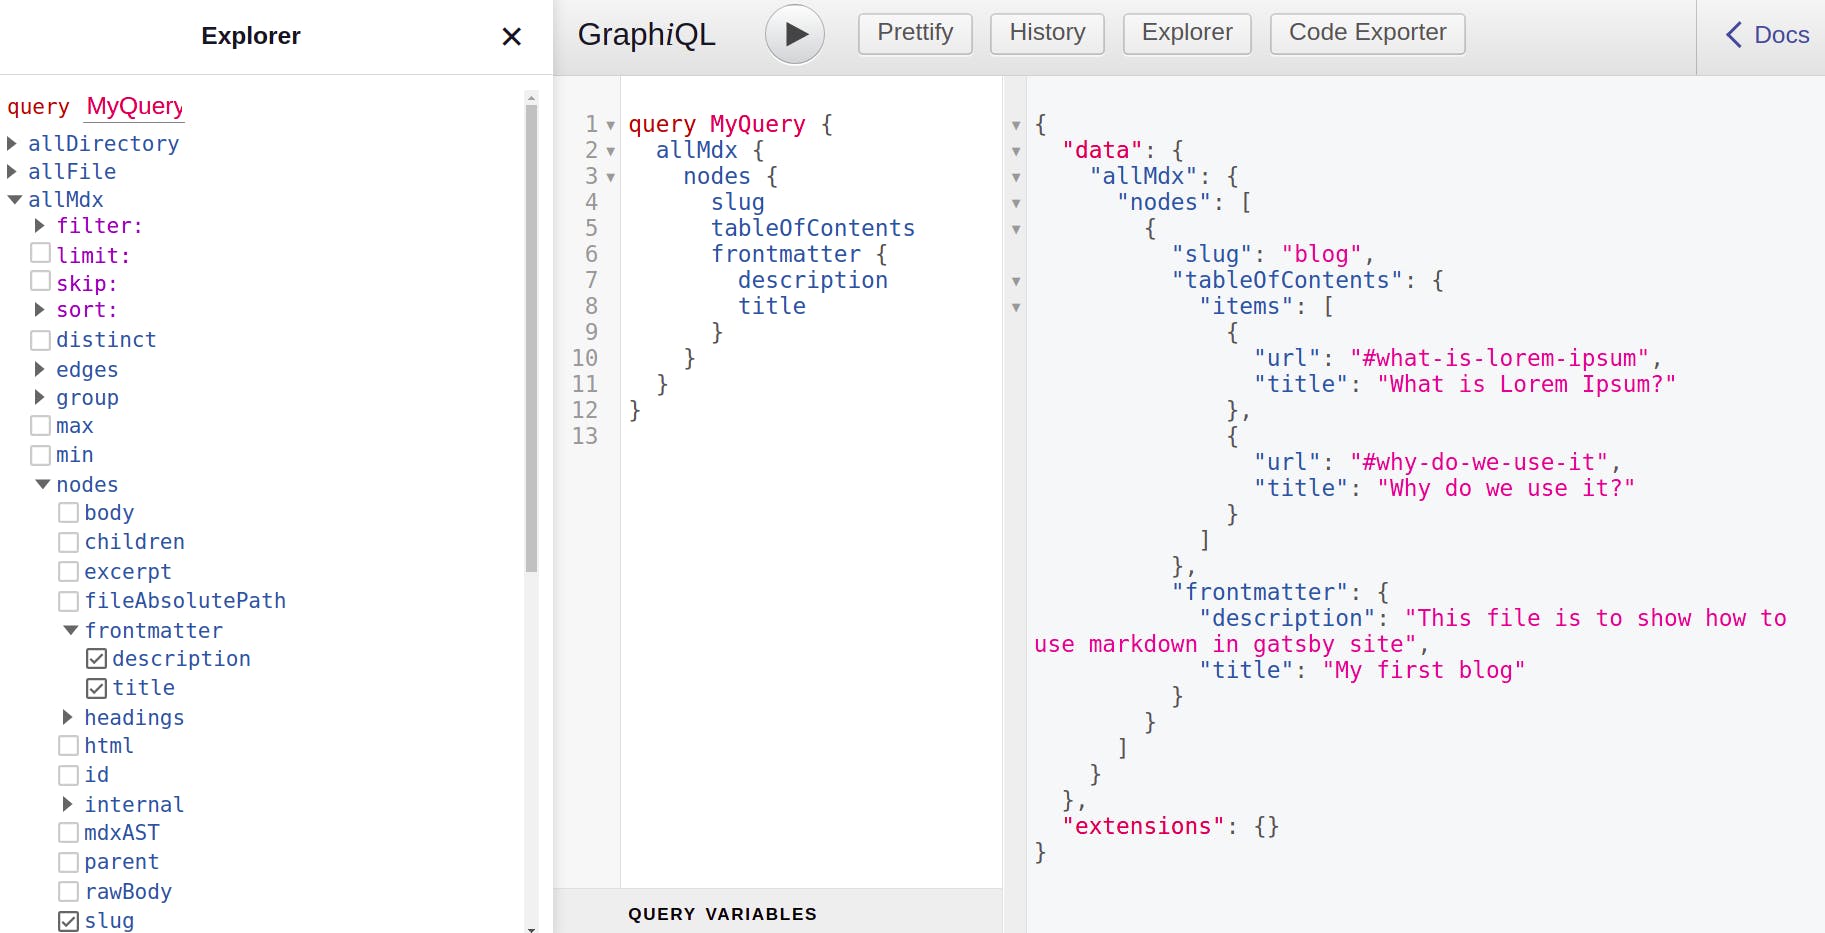
As shown in the above image, this plugin comes with the additional feature which gives you the ability to query out tableOfContent or frontmatter for each markdown file which you can further use in your site.
📍Step 4: Create a template for Markdown
Inside the src folder, create a new folder called templates, this will store the template required to display the content of our markdown file.
In src/templates/Blog.js file:
import { MDXRenderer } from "gatsby-plugin-mdx";
import React from "react";
import Layout from "../components/Layout";

const Blog = ({ pageContext }) => {
  const { blogDescription, blogTitle, body } = pageContext;
  return (
    <div>
      <Layout>
        <h1>{blogTitle}</h1>
        <p>{blogDescription}</p>
        <br />
        <MDXRenderer>{body}</MDXRenderer>
      </Layout>
    </div>
  );
};

export default Blog;
pageContext prop has its special meaning. It gives you access to all the required information of your markdown file.
🪄 pageContext
- Using the pageContext props in the template component can come with its performance advantages, of getting in all the data you need at build time; from the createPages API.
- This removes the need to have a GraphQL query in the template component.
🪄 MDXRenderer
- MDXRenderer is a React component that takes compiled MDX content and renders it. You will need to use this if your MDX content is coming from a GraphQL page query or StaticQuery.
📍Step 5: Use gatsby createPage API
We want gatsby to automatically generate pages for each markdown file via NodeJS.
To do this we'll use the file called gatsby-node.js.
- gatsby-node.js file will run at the build time in a node environment so we can run certain functions inside this file to do things like fetch data & then generate pages with that data based on a template file that we have created earlier.
To create a page dynamically we'll use the gatsby createPage API.
🪄 createPage API
Create pages dynamically. This extension point is called only after the initial sourcing and transformation of nodes plus creation of the GraphQL schema are complete so you can query your data in order to create pages.
In gatsby-node.js file:
exports.createPages = async ({ actions, graphql, reporter }) => {
  const result = await graphql(`
    query {
      allMdx {
        nodes {
          body
          slug
          frontmatter {
            title
            description
          }
        }
      }
    }
  `);

  if (result.errors) {
    reporter.panic("failed to create posts ", result.errors);
  }

  const pages = result.data.allMdx.nodes;

  // The context object **is** supplied to MDX templates through the pageContext prop.

  pages.forEach((page) => {
    actions.createPage({
      path: page.slug,
      component: require.resolve("./src/templates/Blog.js"),
      context: {
        pathSlug: page.slug,
        body: page.body,
        blogTitle: page.frontmatter.title,
        blogDescription: page.frontmatter.description
      },
    });
  });
};
In the above code snippet, first we'll make an graphQL query and use the gatsby createPage API to create new page. Inside this we can define:
- component: It refers to the template you want to use for your markdown file.
- context: this object contains all the data you want to pass to the template as a pageContext prop.
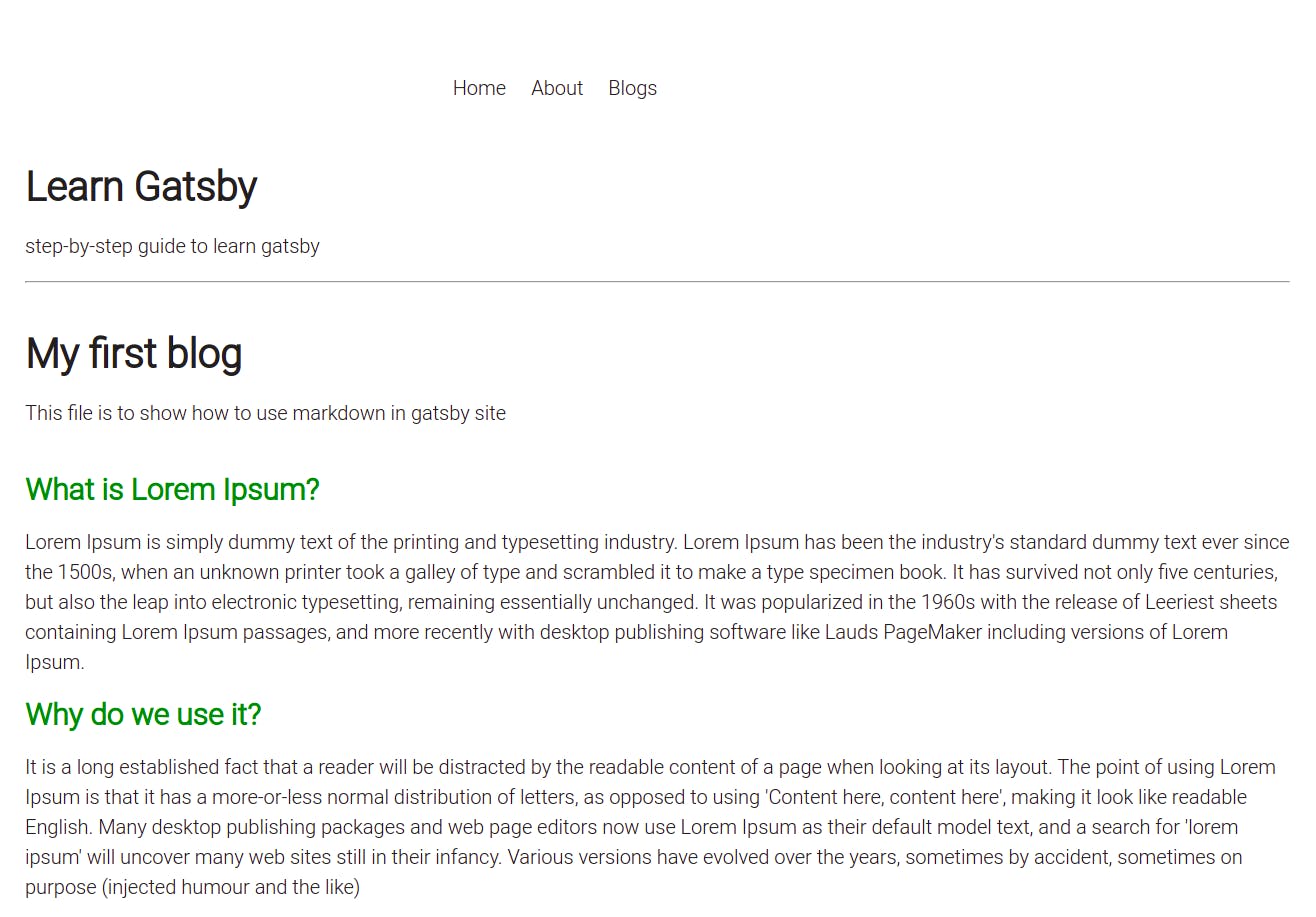
Now if you navigate to http://localhost:8000/blog it will show your newly created page from markdown:
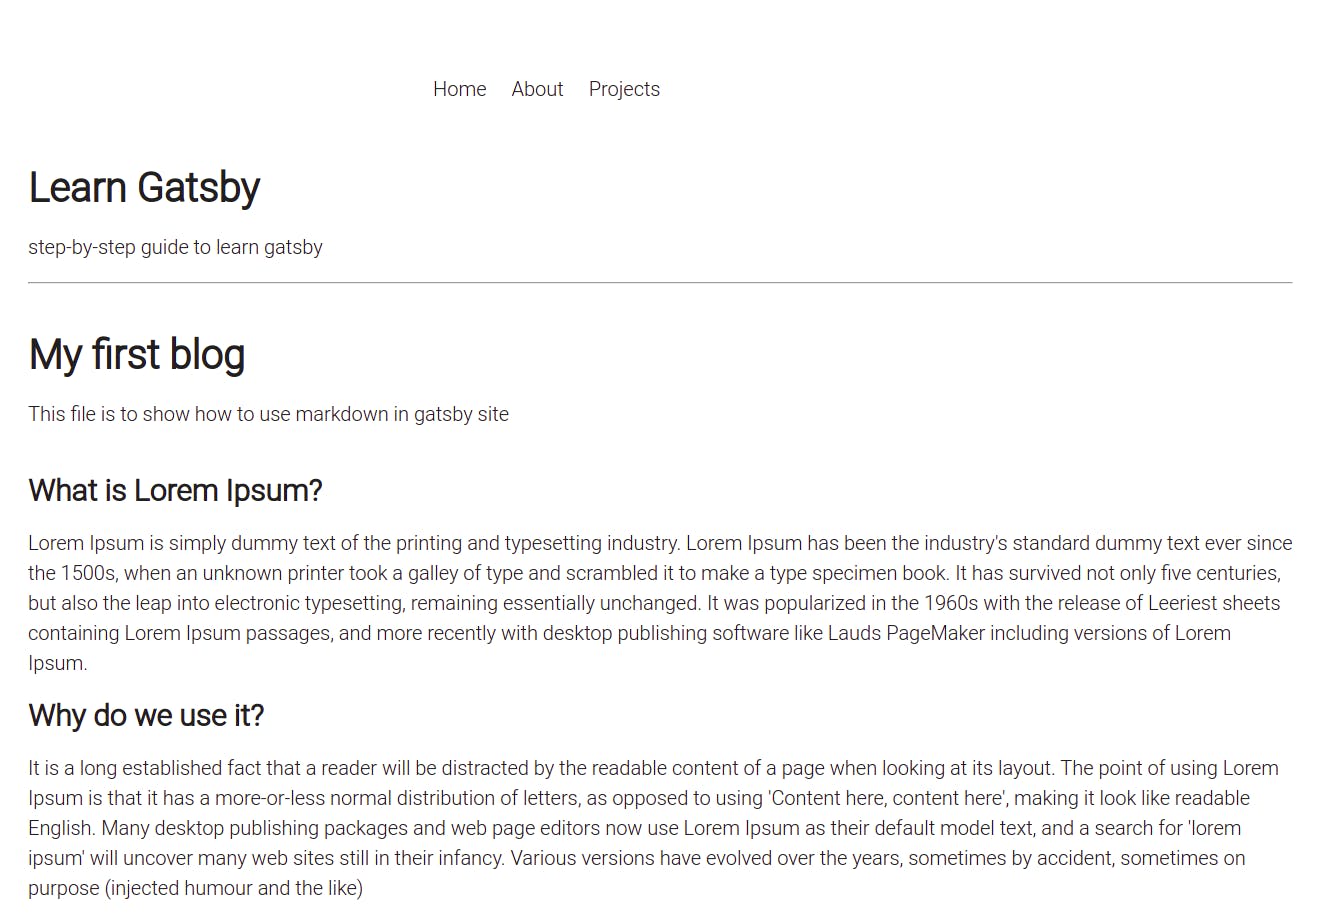
Finally we have created our first dynamic page 🎉🎉. But there are lot more we can do with the markdown files. Let's see more cool features of MDX.
📍More about MDX
🪄 What is MDX?
According to Gatsby's Official documentation:
MDX is a markdown for the component era. It lets you write JSX embedded inside markdown. It’s a great combination because it allows you to use markdown’s often terse syntax (such as # heading) for the little things and JSX for more advanced components.
- MDX allows you to use React components alongside Markdown.
- You can also import and reuse your own React components and even other MDX documents.
In your markdown file:
--
title: Example to show how to use React Components inside Markdown
---
import { CustomHeading } from "./components/Headings";

## You can import your own components.
<CustomHeading>This will show my custom heading component</CustomHeading>
To avoid having to import the same component inside of every MDX document, you can add components to an MDXProvider to make them globally available in MDX pages. This pattern is sometimes referred to as shortcodes.
🪄 MDXProvider
- MDXProvider is a React component that allows you to replace the rendering of tags in MDX content.
- You can also expose any custom component to every mdx file using MDXProvider
To use MDXProvider just make changes in your src/components/Layout.js file:
import React from 'react';
import Header from './Header';
import { MDXProvider } from "@mdx-js/react"

export default function Layout({ children }) {

  const CustomHeading = props => <h2 style={{ color: "green" }} {...props} />

  const components = {
    h2: CustomHeading,
  }

  return (
    <div className="layout">
      <Header />
      <div className="content">
        <h1>{title}</h1>
        <p>{description}</p>
        <hr />
        {/* content for each page */}
        <MDXProvider components={components}>{children}</MDXProvider>
      </div>
    </div>
  )
}
Using this, now all the H2 heading inside the mdx file will be updated with our custom heading component.
🔍 Other Useful Resources
🔍 Wrap Up!!
That's all for this article. Thank you for your time!! Let's connect to learn and grow together.
