Create Reusable Web Components in HTML

A software engineer who likes to explore new technologies, problem-solving, build projects, and have a keen interest in Web development.
Ever think of creating a webpage using HTML with a simple Header and Footer? That's easy, right?
But what if your application grows and you need to repeat the same code for the header and footer 5, 10, or say 15 times?

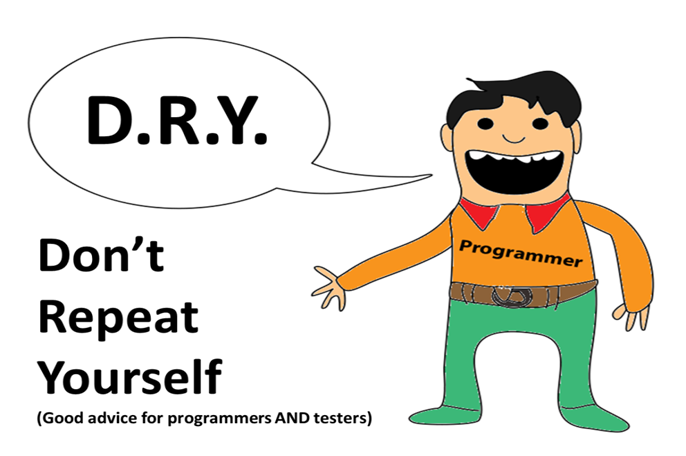
Remember the DRY (Don't Repeat Yourself) principle of software development.
With the introduction of Web Components, it becomes easy to solve this problem and to create reusable HTML components.
In this article, we'll learn about Web Components in-depth, the easiest way to create custom HTML elements.
What are Web Components?
It is a suite of different technologies allowing you to create reusable custom elements — with their functionality encapsulated away from the rest of your code — and utilize them in your web apps.
It consists of three main technologies
HTML templates : The "template" and "slot" elements enable you to write markup templates that are not displayed on the rendered page. These can then be reused multiple times as the basis of a custom element's structure.
Custom elements : A set of JavaScript APIs that allow you to define custom elements and their behavior, which can then be used as desired in your user interface.
Shadow DOM : A set of JavaScript APIs for attaching an encapsulated "shadow" DOM tree to an element — which is rendered separately from the main document DOM — and controlling associated functionality.
In this article, we'll discuss about the Shadow DOM implementation.
Shadow DOM refers to the ability of the browser to include a subtree of DOM elements into the rendering of a document, but not into the main document DOM tree.
It allows hidden DOM trees to be attached to elements in the regular DOM tree — this shadow DOM tree starts with a shadow root, underneath which can be attached to any elements you want, in the same way as the normal DOM.
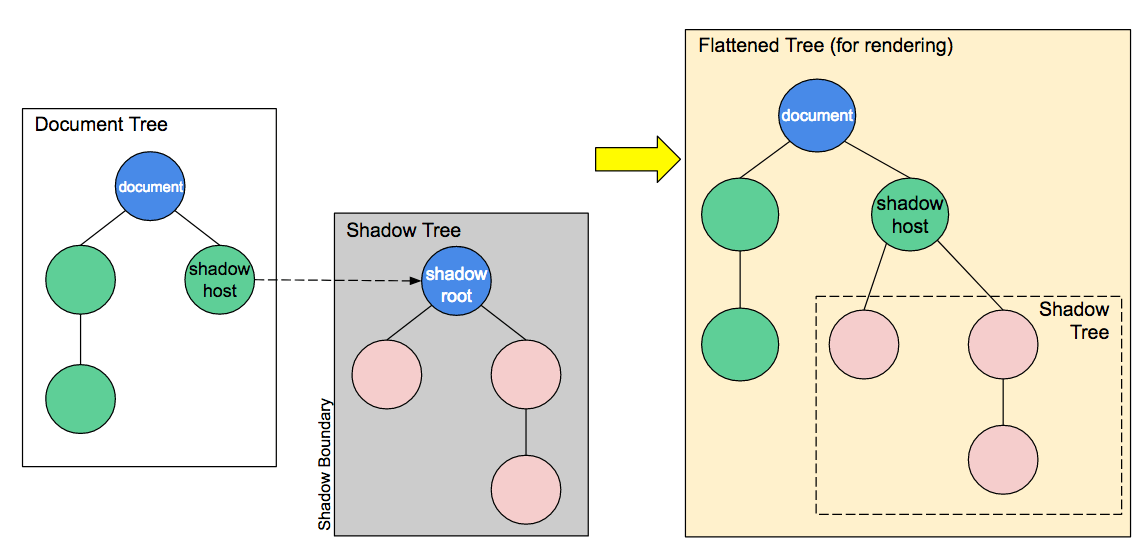
There are some terminologies related to shadow DOM :
Shadow host: The regular DOM node that the shadow DOM is attached to.
Shadow tree: The DOM tree inside the shadow DOM.
Shadow boundary: the place where the shadow DOM ends, and the regular DOM begins.
Shadow root: The root node of the shadow tree.
Let's understand this with a simple example:-
Step 1: Create a Class Definition
To begin with, in our header.js file we define a class called Header, which extends HTMLElement:
class Header extends HTMLElement {
  constructor() {
    // Always call super first in constructor
    super();

    // write element functionality in here
    ...
  }
}
Inside the class definition, we define the element's constructor, which defines all the functionality the element will have when an instance of it is instantiated.
Step 2: Create Shadow Root
We first attach a shadow root to the custom element:
// Create a shadow root
const shadowRoot = this.attachShadow({ mode: 'open' });
There are two options for 'mode' : *'open' * & 'closed'.
mode: open means that you can access the shadow DOM using JavaScript written in the main page context.
If you attach a shadow root to a custom element with **mode: closed ** set, you won't be able to access the shadow DOM from the outside — myCustomElem.shadowRoot returns null.
Step 3: Creating the Shadow DOM Structure
Next, we use some DOM manipulation to create the element's internal shadow DOM structure:
const headerTemplate = document.createElement('template');
headerTemplate.innerHTML = `

<div>
    <div class="header">
        <h1> Header - My First Blog on Web Component </h1>
    </div>
</div>`
Step 4: Attaching the shadow DOM to the shadow root
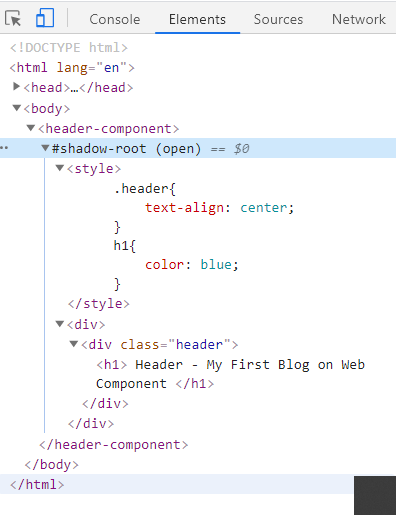
The final step is to attach all the created elements to the shadow root. connectedCallback runs each time your custom element is inserted into the DOM.
connectedCallback() {
        const shadowRoot = this.attachShadow({ mode: 'closed' });
        shadowRoot.appendChild(headerTemplate.content);
}
Step 5: Styling the shadow DOM
After that we create a style element and populate it with some CSS to style it:
const headerTemplate = document.createElement('template');
headerTemplate.innerHTML = `

<style>
    .header{
        text-align: center;
    }
    h1{
        color: blue;
    }
</style>

<div>
    <div class="header">
        <h1> Header - My First Blog on Web Component </h1>
    </div>
</div>
`
In the above example, we apply a style to the Shadow DOM using a style element, but it is perfectly possible to do it by referencing an external stylesheet from a "link" element instead.
const headerTemplate = document.createElement('template');
headerTemplate.innerHTML = `

<link rel="stylesheet" href="https://maxcdn.bootstrapcdn.com/bootstrap/4.5.0/css/bootstrap.min.css">
<link href="css/style.css" rel="stylesheet">
Your resultant header.js file will look like this:
const headerTemplate = document.createElement('template');
headerTemplate.innerHTML = `

<style>
    .header{
        text-align: center;
    }
    h1{
        color: blue;
    }
</style>

<div>
    <div class="header">
        <h1> Header - My First Blog on Web Component </h1>
    </div>
</div>
`

class Header extends HTMLElement {
    constructor() {
        // Always call super first in constructor
        super();
    }

    connectedCallback() {
        const shadowRoot = this.attachShadow({ mode: 'open' });
        shadowRoot.appendChild(headerTemplate.content);
    }
}

customElements.define('header-component', Header);
Step 6: Import your component into HTML file
Create an index.html file and add your custom header component to it.
<!DOCTYPE html>
<html lang="en">

<head>
    <meta charset="UTF-8">
    <meta name="viewport" content="width=device-width, initial-scale=1.0">
    <title>Web Components</title>
    <script src="header.js"></script>
</head>

<body>
    <header-component></header-component>
</body>

</html>
Now run index.html in browser:
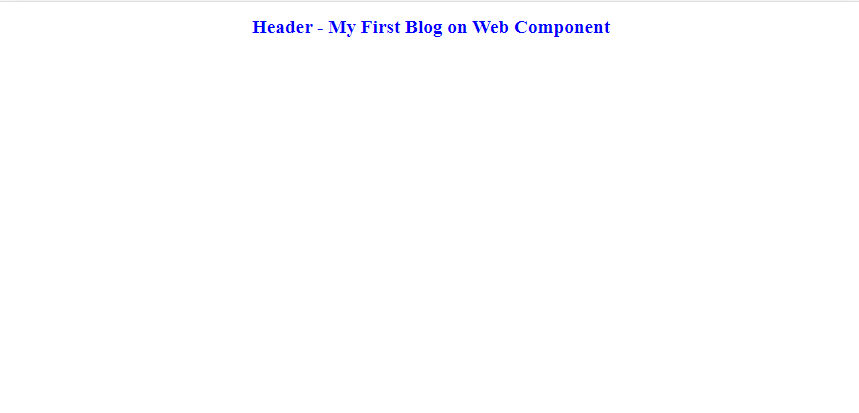
Congrats!! you have created your first custom HTML component.

Thank you for reading. This is the first time that I wrote any blog article. I hope you enjoyed reading it. Please share it with your network. Don’t forget to leave your comments below.


